The Compustar install manual is a comprehensive guide for installing Compustar systems, ensuring proper setup and functionality. It covers essential features, compatibility, and setup steps for a seamless experience.
1.1 Overview of the Compustar System
The Compustar system is a high-quality remote start and security solution designed for vehicles. It offers advanced features like remote starting, keyless entry, and alarm functions. The system is compatible with various vehicles but requires proper installation to ensure functionality. A key manual is needed for operation, and certain models, like manual transmissions, may require special considerations. The system supports features such as Timer Start, which enables automatic vehicle starting based on time or temperature settings. Components include remotes, control modules, and wiring harnesses. The system must be installed by authorized technicians to maintain warranty validity. The user manual provides detailed instructions for installation, programming, and troubleshooting, ensuring optimal performance and user satisfaction.
1.2 Importance of Proper Installation
Proper installation of the Compustar system is crucial for ensuring reliability, safety, and optimal performance. Improper installation can void the warranty, cause system malfunctions, and lead to security vulnerabilities. It is strongly recommended to have the system installed by an authorized Firstech dealer to maintain warranty coverage. Additionally, incorrect wiring or component placement can result in faulty operation, including remote start failures or false alarms. Proper installation ensures all features, such as Timer Start and remote programming, function as intended. It also prevents potential damage to the vehicle’s electrical system. Always refer to the installation manual and follow guidelines to ensure a secure and efficient setup, avoiding common issues like drained batteries or compromised security features.

Installation Prerequisites
Ensure vehicle compatibility, gather necessary tools, and complete pre-installation checks. Verify all components, wiring, and vehicle systems are operational before proceeding with the installation process.
2.1 Vehicle Compatibility and Requirements
Ensure the vehicle is compatible with the Compustar system. Most vehicles, including sedans and SUVs, are supported, but manual transmission vehicles require extra precautions. The system must be installed on vehicles with operational door pins and functional windows. Additionally, certain features like Timer Start may need specific settings during installation. Avoid installing on vehicles with incompatible systems or alarm features. Always verify the vehicle’s make, model, and year match the system’s compatibility list. For manual transmission vehicles, additional safety measures are necessary to prevent accidental starts. Ensure the vehicle meets all specified requirements before proceeding with the installation to avoid malfunctions or warranty issues.
2.2 Tools and Materials Needed
To ensure a successful installation, gather the necessary tools and materials. Essential tools include screwdrivers (Phillips and flathead), wire strippers, crimping tools, and a multimeter for testing connections. Additional items like a soldering iron, heat gun, and wiring diagram may be needed for complex setups. Required materials include the Compustar system components, wiring harness, fuses, and connectors. Ensure all components are compatible with your vehicle’s make and model. For advanced features, specific modules or adapters may be necessary. Refer to the installation manual for a detailed list of tools and materials. Having everything prepared beforehand will streamline the process and prevent delays. Always use high-quality materials to maintain system performance and reliability.
2.3 Pre-Installation Checks
Before starting the installation, perform several critical checks to ensure compatibility and safety. Verify that the Compustar system is compatible with your vehicle’s make, model, and year. Check the warranty terms, as installations by unauthorized personnel may void the warranty. Ensure the vehicle is not equipped with features that could interfere with the system, such as manual transmissions requiring special handling. Review the owner’s manual to understand existing factory settings and alarms. Inspect the vehicle’s electrical system for any pre-existing issues. Confirm that all components, including remotes and sensors, are included in the kit. Finally, ensure the installation environment is safe, with proper ventilation and no flammable materials nearby. These checks ensure a smooth and problem-free installation process. Proper preparation is key to avoiding future issues.
Installation Process
The installation process involves component preparation, wiring connections, and strategic placement of devices to ensure proper functionality of remote starters and security systems, following the manual’s guidelines.
3.1 Component Preparation
Before starting the installation, ensure all components are prepared and ready for use. This includes verifying the control module, remote transmitters, wiring harness, and antennas. Begin by unpacking and inventorying all items to confirm nothing is missing or damaged. Inspect each component for any visible damage or defects. For remote transmitters, insert the batteries according to the manual’s instructions and test their functionality. The control module may require initial programming or firmware updates, which should be done prior to installation. Additionally, pre-strip any wires and prepare connectors as specified in the wiring diagram. Proper preparation ensures a smooth and efficient installation process. Refer to the manual for specific preparation steps for each component to avoid delays.
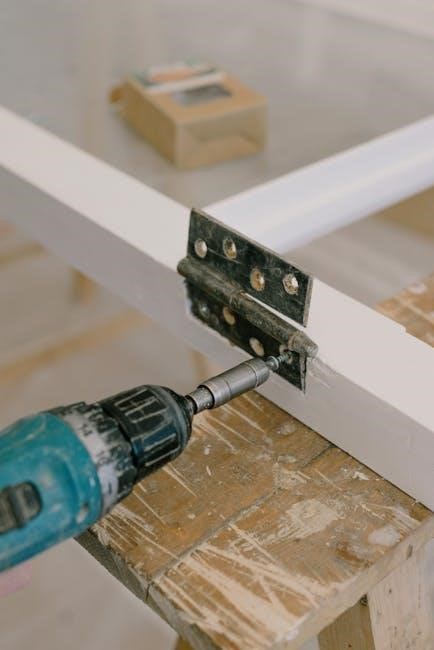
3.2 Wiring and Connections
Wiring and connections are critical for a successful Compustar installation. Begin by referring to the wiring diagram provided in the manual to identify the correct wires for your vehicle. Connect the control module to the vehicle’s electrical system, ensuring all wires are securely attached to the appropriate terminals. The input/output harness (I/O harness) should be connected to the control module, and the remote start accessories, such as the ignition, starter, and fuel sensor wires, must be properly linked. Use the correct tools to strip and crimp wires, and avoid any loose connections. Refer to the manual for specific wiring requirements, such as the CN3 connector for the CM900AS harness. Double-check all connections to prevent malfunctions. Improper wiring can void the warranty or damage the system, so precision is essential. Always follow the manufacturer’s guidelines for a safe and reliable setup.
3.3 Placement of Components
Proper placement of components is essential for optimal performance and reliability. Mount the control module in a secure, dry location away from heat sources and moisture. The antenna should be installed on the windshield or a similar location to ensure strong signal reception. Avoid placing components under metal panels, as this can interfere with GPS and cellular connectivity, especially for features like DroneMobile. Secure all wires and connections to prevent damage from vibrations or movement. Ensure the remote start brain is accessible for future programming or troubleshooting. Placement of the remote start button or valet switch should be convenient for the user. Always follow the manufacturer’s guidelines for specific component placement to maintain warranty validity and system functionality. Proper installation ensures safety, efficiency, and longevity of the Compustar system.

Programming the System
Programming involves configuring the remote start and security features to your preferences. Follow the manual’s remote programming procedures to ensure proper functionality and feature activation, maintaining warranty validity.
4.1 Remote Programming Procedures

Remote programming is essential for syncing your Compustar system with your vehicle. Begin by ensuring all components are installed correctly. Next, enter valet mode by inserting the key into the ignition and turning it to the “On” position. Within 20 seconds, press and hold the remote’s programming button until the system confirms the remote is recognized. Repeat this process for additional remotes. Ensure the vehicle’s doors are closed and windows are rolled up during programming to avoid interference. Refer to the manual for specific timing and button sequences, as improper programming may result in system malfunctions. Always verify functionality post-programming to ensure success. Proper programming ensures reliable operation and maintains warranty coverage.
4.2 Setting Up Features Like Timer Start
Timer Start is a convenient feature that automatically starts your vehicle based on a preset time or temperature. To activate this feature, ensure your vehicle’s windows are rolled up and doors are closed. Access the Timer Start settings through the remote or system interface, selecting your preferred activation time or temperature threshold. Refer to the manual for specific programming instructions, as settings may vary by model. Once configured, the system will automatically start your vehicle according to your selected parameters. Note that Timer Start should not be installed in manual transmission vehicles without additional precautions, as this may cause operational issues. Always follow the manual’s guidelines to ensure proper functionality and maintain warranty validity.
Troubleshooting Common Issues
Common issues during installation include wiring faults, remote malfunctions, and system incompatibility. Consult the manual for diagnostic steps and solutions to resolve these problems effectively.
5.1 Diagnosing Installation Problems
Diagnosing installation issues with your Compustar system involves checking wiring connections, component placement, and system compatibility. Ensure all wires are securely connected to the correct terminals, as loose connections can cause malfunctions. Verify that components like the brain module, remote, and sensors are installed in suitable locations. Consult the manual for specific wiring diagrams and troubleshooting guides. If issues persist, test individual components to isolate the problem. For complex systems, refer to the Blade install guide or iDataLink resources for detailed diagnostics. Always ensure the system is compatible with your vehicle’s make and model. If unsure, contact an authorized Firstech technician for professional assistance.
5.2 Resolving Remote Start Malfunctions
Resolving remote start malfunctions involves identifying the root cause and addressing it systematically. First, check the remote battery and ensure it is functioning properly. If issues persist, reprogram the remote following the procedures outlined in the manual. Verify that all wiring connections are secure and correct, especially the ignition, starter, and accessory wires. Consult the wiring diagram in the manual for specific connections. If the system fails to start the vehicle, ensure the ignition key is in the “On” position and all doors are closed. For advanced issues, refer to the Blade install guide or iDataLink resources for troubleshooting. If the problem remains unresolved, contact an authorized Firstech technician for professional assistance to avoid voiding the warranty.

Warranty and Support
Compustar systems are backed by a comprehensive warranty and dedicated customer support. Visit www.compustar.com for detailed warranty terms and to access support resources or find authorized dealers.
6.1 Warranty Coverage Details
Compustar systems are protected under a comprehensive warranty program. The manufacturer’s warranty is voided if installation is performed by anyone other than an authorized Firstech dealer. Firstech remotes carry a 1-year warranty from the original purchase date, while the Compustar Pro 2WQ9R-FMX remote also offers a 1-year warranty. For complete details, visit www.compustar.com or refer to the last page of this manual. Proper installation and adherence to guidelines are essential to maintain warranty validity. Unauthorized modifications or installations may result in coverage termination. Ensure all components are installed by certified professionals to uphold warranty benefits and system performance.
6;2 Accessing Customer Support
Compustar provides dedicated customer support to assist with installation, troubleshooting, and product inquiries. Visit www.compustar.com for comprehensive resources, including manuals, FAQs, and support contact information. Users can download PDF manuals for specific models, such as the CompuSTAR 2W803R-SS, directly from the website. For technical issues, contact authorized Firstech dealers or refer to the support page for detailed guides and troubleshooting tips. Additionally, the Blade install guide and wire schematics are available online for advanced installations. Ensure to use authorized channels for support to maintain warranty coverage and resolve issues efficiently. Compustar’s customer support ensures a smooth experience for all users, from installation to ongoing system maintenance.